Diaspora 主题魔改
七月 14, 2021

Blogroot,主题根目录为 ThemerootSublime TextThemeroot/_config.yml,在里面添加配置1
2
3
# 帖子视图 ( 'cover' 、 'all' 、 '')
# 设定有三种视图,cover 为封面视图(标题在封面内显示),all 为两者同时显示(封面跟标题分开显示),留空则默认显示
postview: 'cover'Themeroot/layout/_partial/post/article.ejs ,在最顶部添加代码1
2
3
4
5
6
7
8
9
10
11
12
13
14
15
16
17
18
19
20
21
22
23
24
25
26
27
28
29
30
31
32
33
34
<!-- 帖子视图 -->
<% var number = 0; %>
<% if (theme.cover.length > 0){ %>
<% var min = Math.ceil(0); %>
<% var max = Math.floor(theme.cover.length-1); %>
<% var number = Math.floor(Math.random() * (max - min + 1)) + min; %>
<% } %>
<% if ( theme.postview == 'cover'){ %>
<div class="post_cover" >
<% if ( page.cover == '' || page.cover == null ){ %>
<img src="<%- theme.cover[number] %>" />
<% } else { %>
<img src="<%- page.cover %>" />
<% } %>
<div class="post_cover_mask"></div>
<div class="post_text">
<h1><%- page.title %></h1>
<div>
<span><%- page.date.locale("zh-cn").format("MMMM DD, YYYY") %></span>
<%- partial('_partial/post/tag', {post: page}) %>
</div>
</div>
</div>
<% } else if( theme.postview == 'all'){ %>
<div class="post_cover" >
<% if ( page.cover == '' || page.cover == null ){ %>
<img src="<%- theme.cover[number] %>" />
<% } else { %>
<img src="<%- page.cover %>" />
<% } %>
</div>
<% } %>
<!-- END -->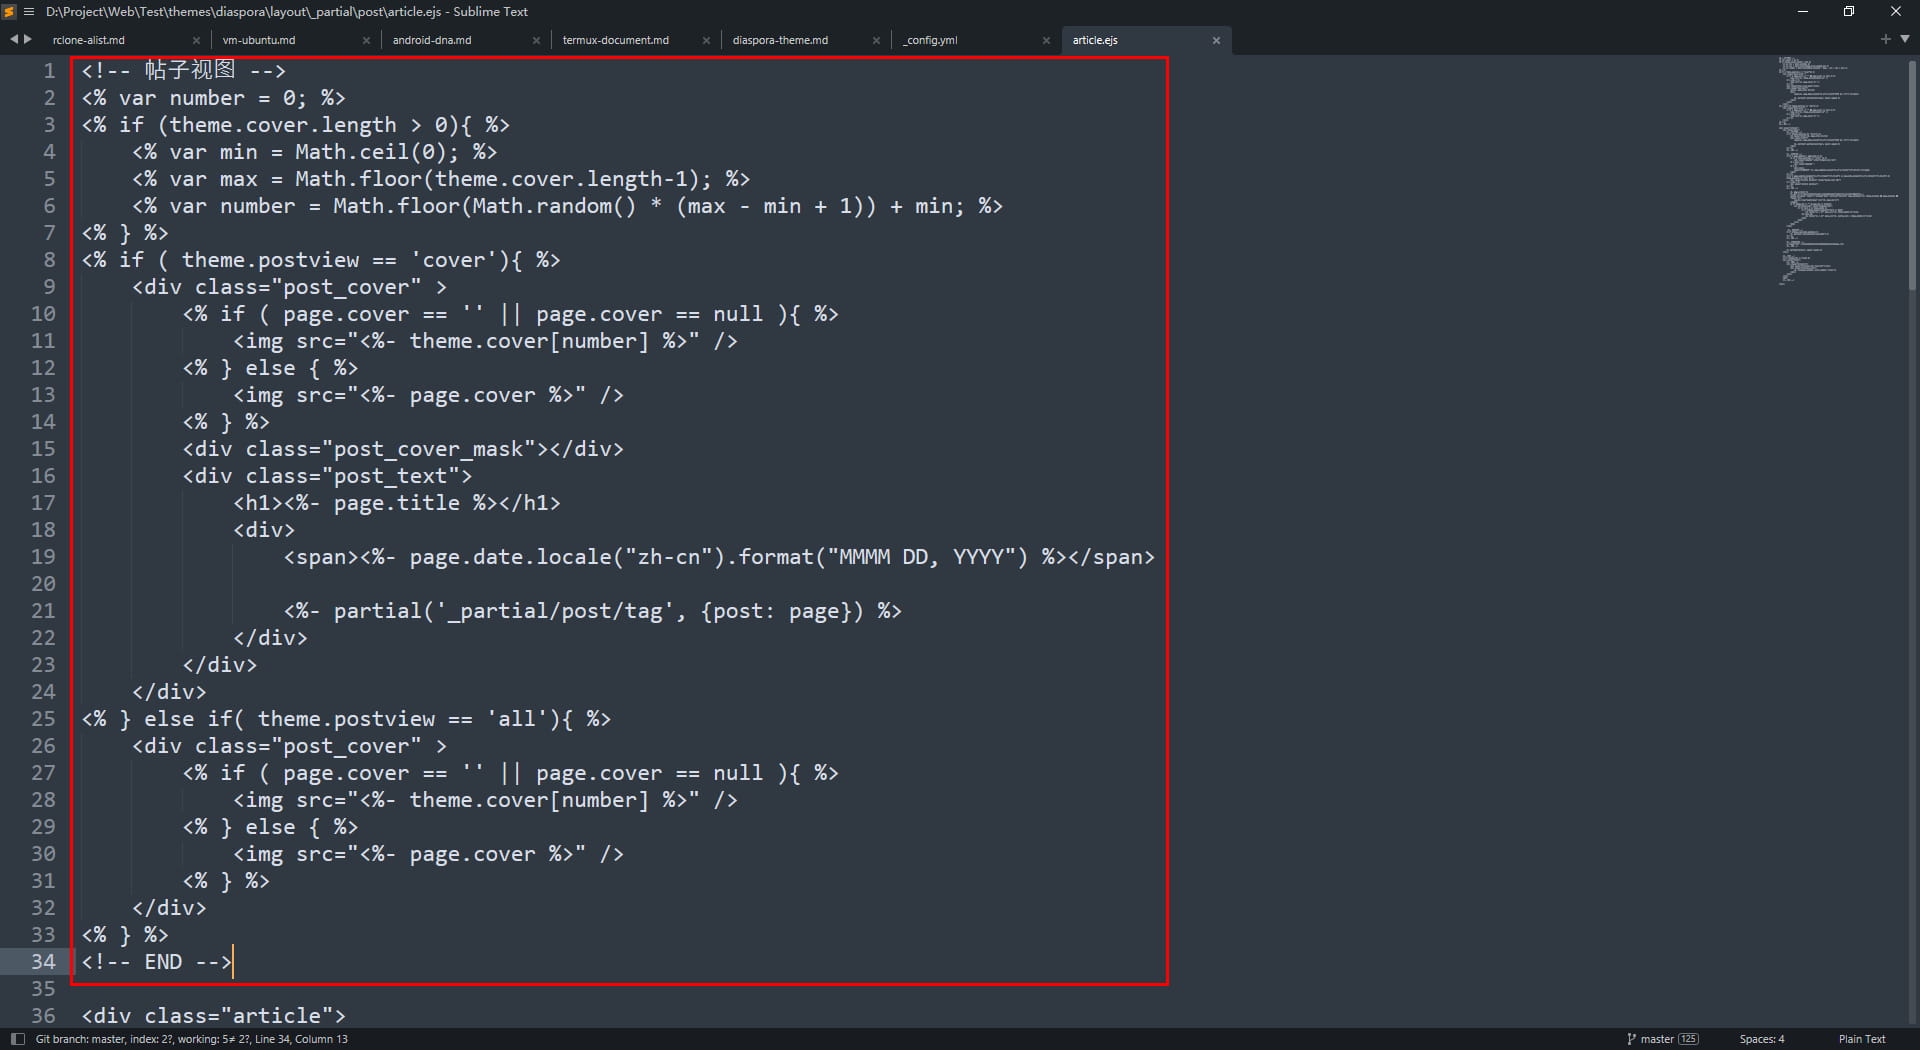
1
2
3
4
5
6
7
8
9
10
<!-- 帖子视图 -->
<% if (theme.postview != 'cover'){ %>
    <h1 class="title"><%- page.title %></h1>
    <div class="stuff">
        <span><%- page.date.locale("zh-cn").format("MMMM DD, YYYY") %></span>

        <%- partial('_partial/post/tag', {post: page}) %>
    </div>
<% } %>
<!-- END -->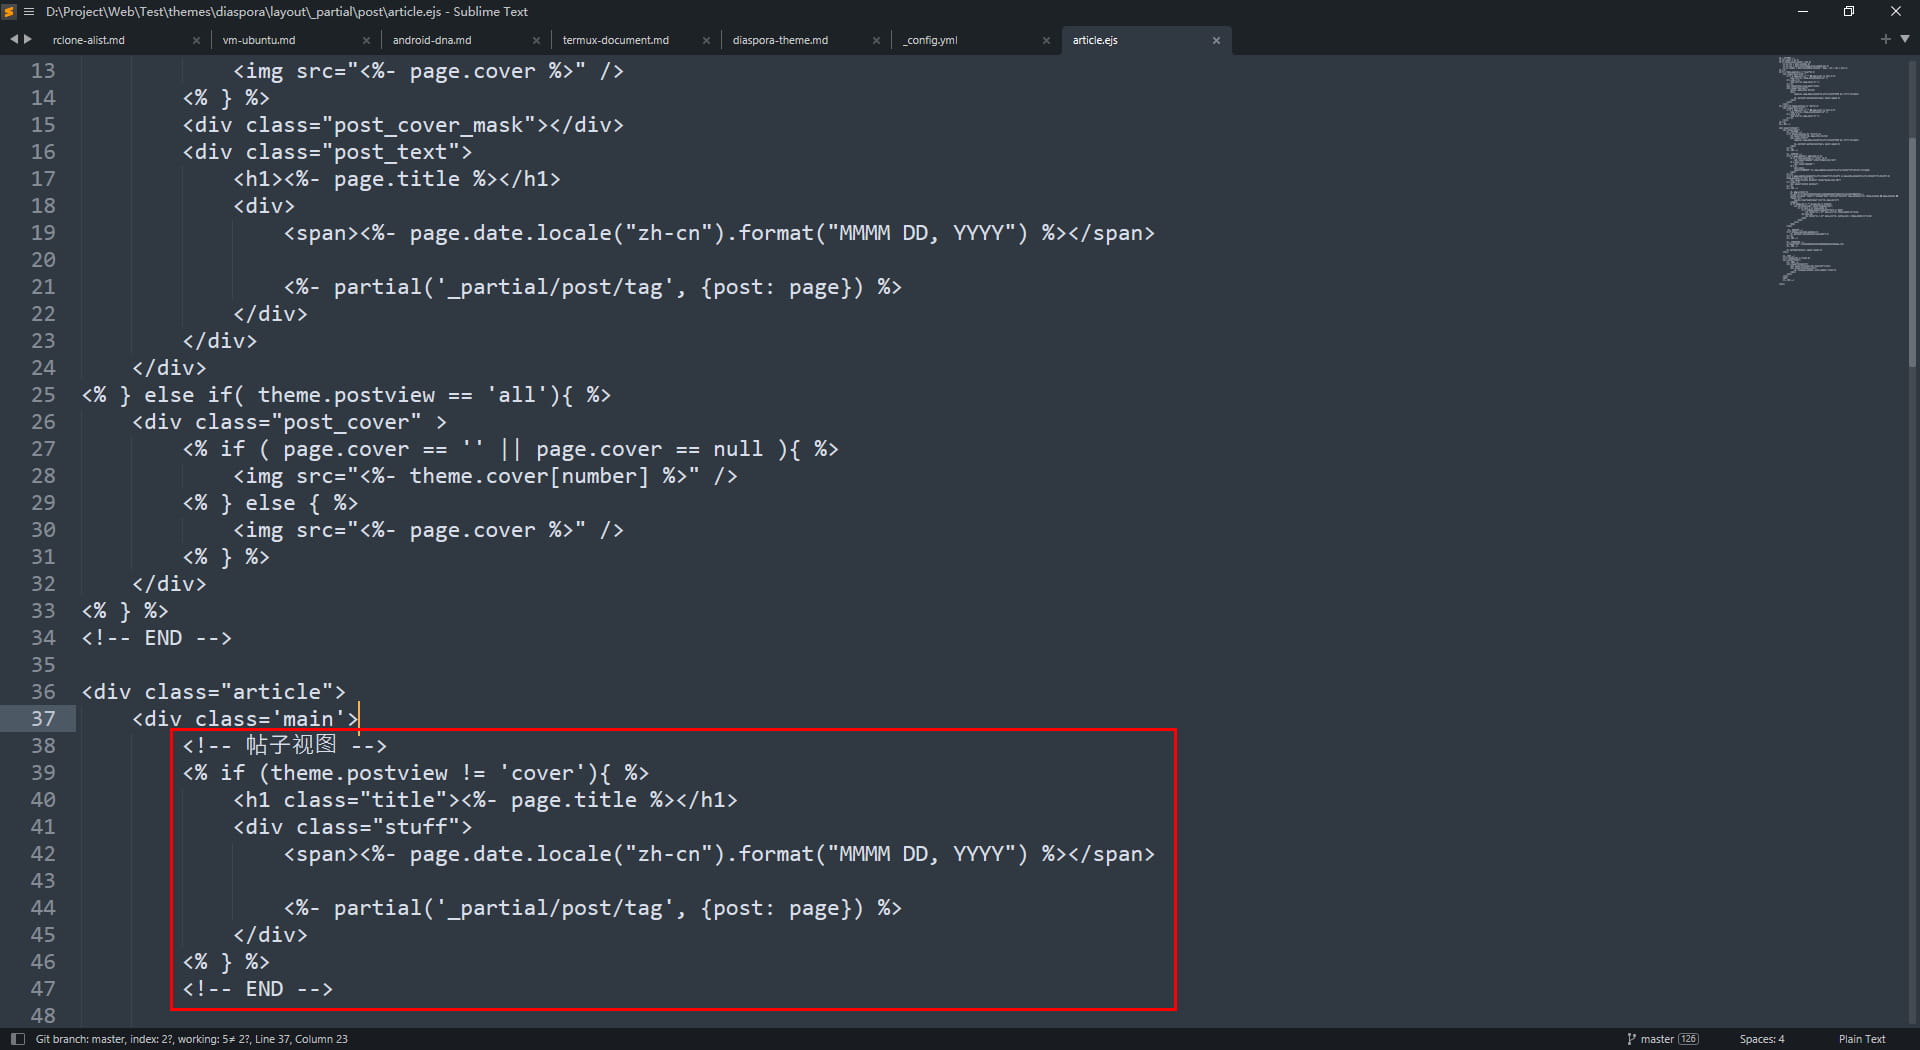
Themeroot/source/css/ 目录下新建一个css样式文件,我这里把它命名为 add.css,然后在里面添加样式1
2
3
4
5
6
7
8
9
10
11
12
13
14
15
16
17
18
19
20
21
22
23
24
25
26
27
28
29
30
31
32
33
34
35
36
37
38
39
40
41
42
43
44
45
46
47
48
49
50
51
52
53
54
55
56
57
58
59
60
61
62
63
64
65
66
67
68
69
70
/*帖子封面*/
.post_cover {
    width: 100%;
    height: 50vw;
    position: relative;
    pointer-events: none;
}

.post_cover img {
    width: 100%;
    height: 100%;
    object-fit: cover;
    position: absolute;
    z-index: 0;
}

.post_cover .post_cover_mask {
    width: 100%;
    height: 50%;
    position: absolute;
    background-image: linear-gradient(rgba(0, 0, 0, 0), rgba(0, 0, 0, 1));
    z-index: 0;
    bottom: 0;
}

.post_cover .post_text {
    width: 90%;
    position: absolute;
    color: #ffffff;
    margin: 0 auto;
    z-index: 2;
    left: 5vw;
    bottom: 5rem;
}

.post_cover .post_text h1 {
    font-size: 2.5rem;
    font-weight: bold;
    white-space: nowrap;
    overflow: hidden;
    text-overflow: ellipsis;
    margin-bottom: 10px;
}

.post_cover .post_text div .post-tags-list-item {
    background-color: rgba(255, 255, 255, 0.1);
}

.post_cover .post_text div .post-tags-list-item a {
    color: #ffffff;
    pointer-events: auto;
}

/*自适应*/
@media screen and (max-width:780px) {
    .post_cover {
        height: 60vw;
    }
}

@media screen and (max-width:480px) {
    .post_cover .post_text {
        bottom: 2rem;
    }

    .post_cover .post_text h1 {
        font-size: 1.5rem;
    }

}Themeroot/layout/_partial/head.ejs ,找到 <%- css([‘css/diaspora.css’)%> ,修改为下面代码1
<%- css(['css/diaspora.css', 'css/add.css'])%>打开 Themeroot/layout/_partial/post/article.ejs,在标题的下方添加代码1
2
3
4
5
6
7
8
9
10
11
12
13
14
15
16
17
<!-- 更新时间 -->
<% if ( page.updated > page.date ){ %>
    <% if ( theme.postview == 'cover' ){ %>
        <div class="updated" style="margin-top: 0px">
    <% } else { %>
        <div class="updated" >
    <% } %>
        <div></div>
        <span>该文章更新于 <%- page.updated.locale("zh-cn").format("YYYY.MM.DD") %></span>
    </div>
<% } %>
<% if ( page.updated.locale("zh-cn").format("YYYY.MM.DD") == page.date.locale("zh-cn").format("YYYY.MM.DD") && theme.postview != 'all' ){ %>
    <div class="content markdown" style="margin-top: 0px">
<% } else { %>
    <div class="content markdown">
<% } %>
<!-- END -->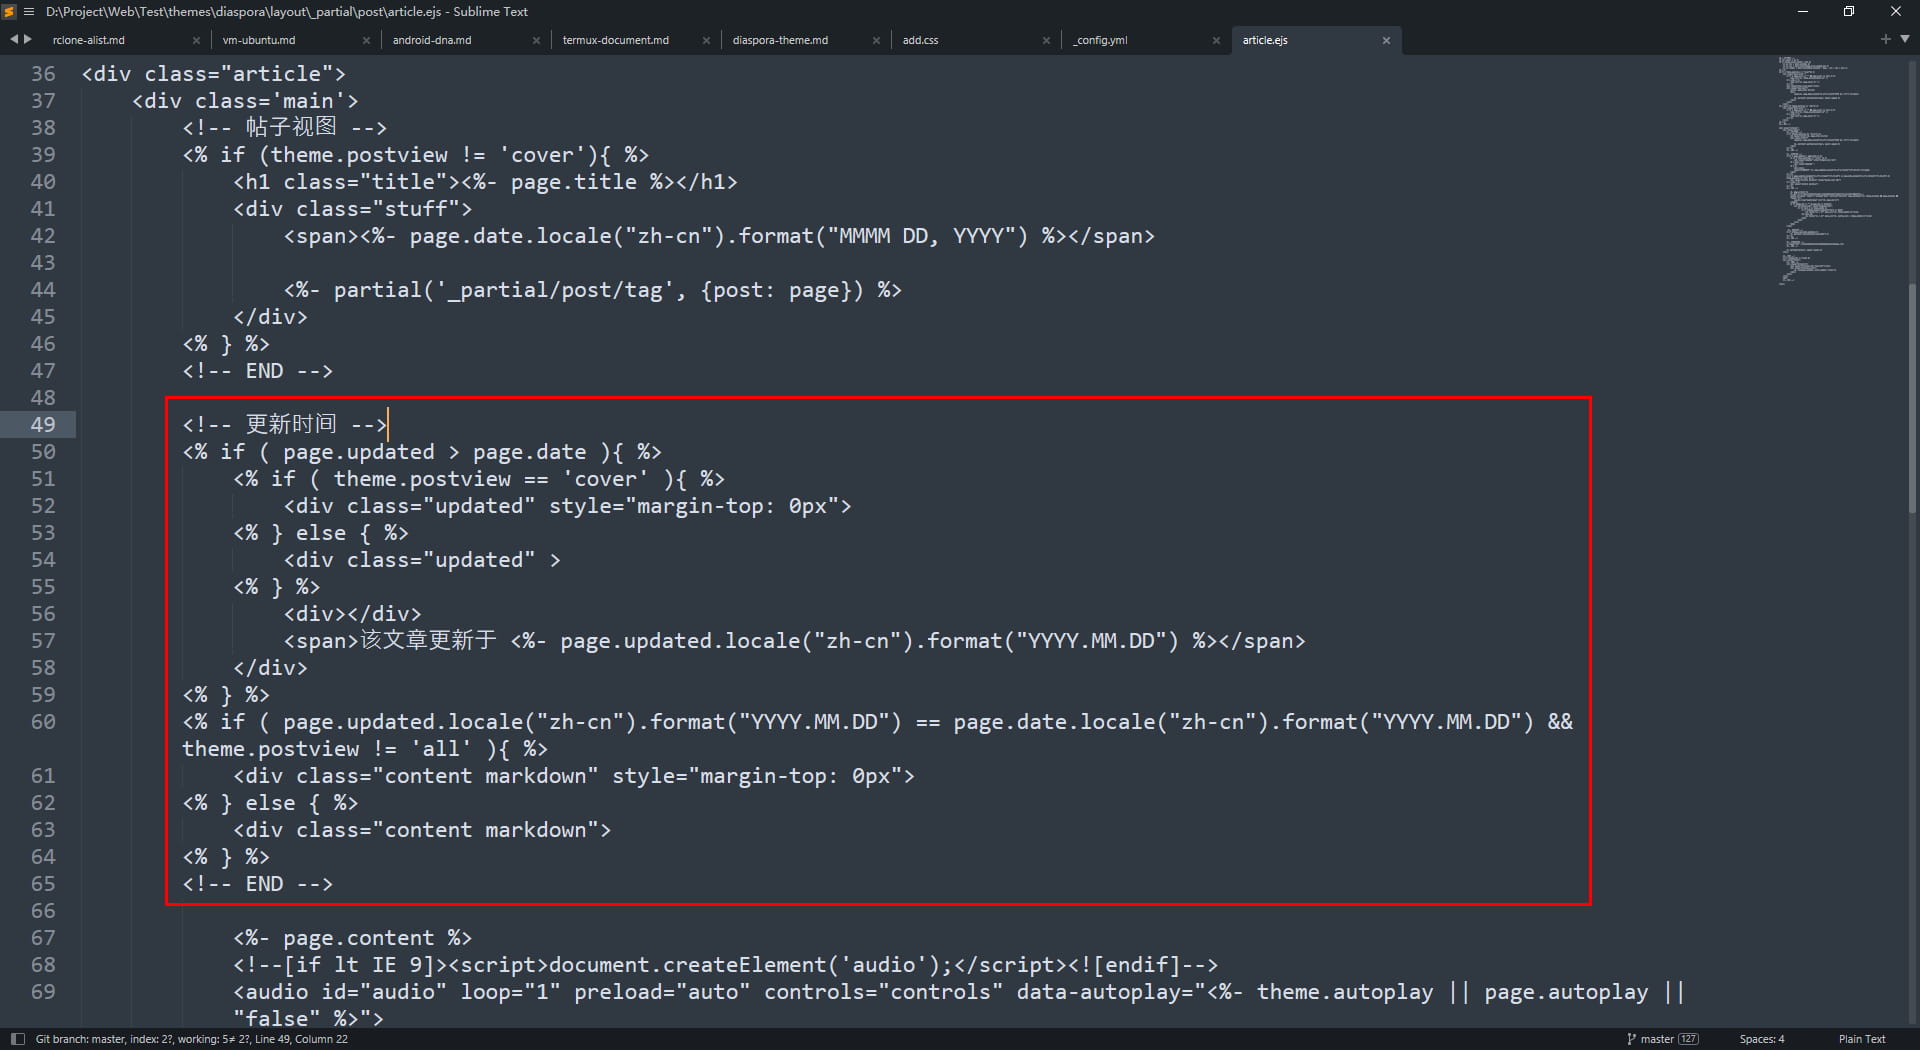
Themeroot/source/css/add.css,在里面添加下列样式1
2
3
4
5
6
7
8
9
10
11
12
13
14
15
16
17
18
19
20
21
22
23
24
/*更新时间*/
.updated {
    width: 100%;
    height: 50px;
    background-color: #FFF7DE;
    border-radius: 10px;
    line-height: 50px;
    margin-top: 30px;
}

.updated div {
    width: 10px;
    height: 50px;
    background-color: #F9B907;
    border-radius: 10px 0px 0px 10px;
    float: left;
    margin-right: 20px;
}

.updated span {
    font-size: 15px;
    color: #6F5E30;
    font-weight: bold;
}Blogroot/scaffolds/post.md,修改帖子默认模板,在里面添加 updated 参数1
updated: {{ date }}Themeroot/_config.yml,在里面添加配置1
2
# 点击效果
fireworks: trueThemeroot/layout/_partial/head.ejs,添加下面的代码1
2
3
4
5
6
7
<!-- 点击效果 -->
<% if (theme.fireworks){ %>
<canvas class="fireworks" style="position: fixed;left: 0;top: 0;z-index: 1; pointer-events: none;" ></canvas>
<script type="text/javascript" src="/js/anime.min.js"></script>
<script type="text/javascript" src="/js/fireworks.js"></script>
<% } %>
<!-- END -->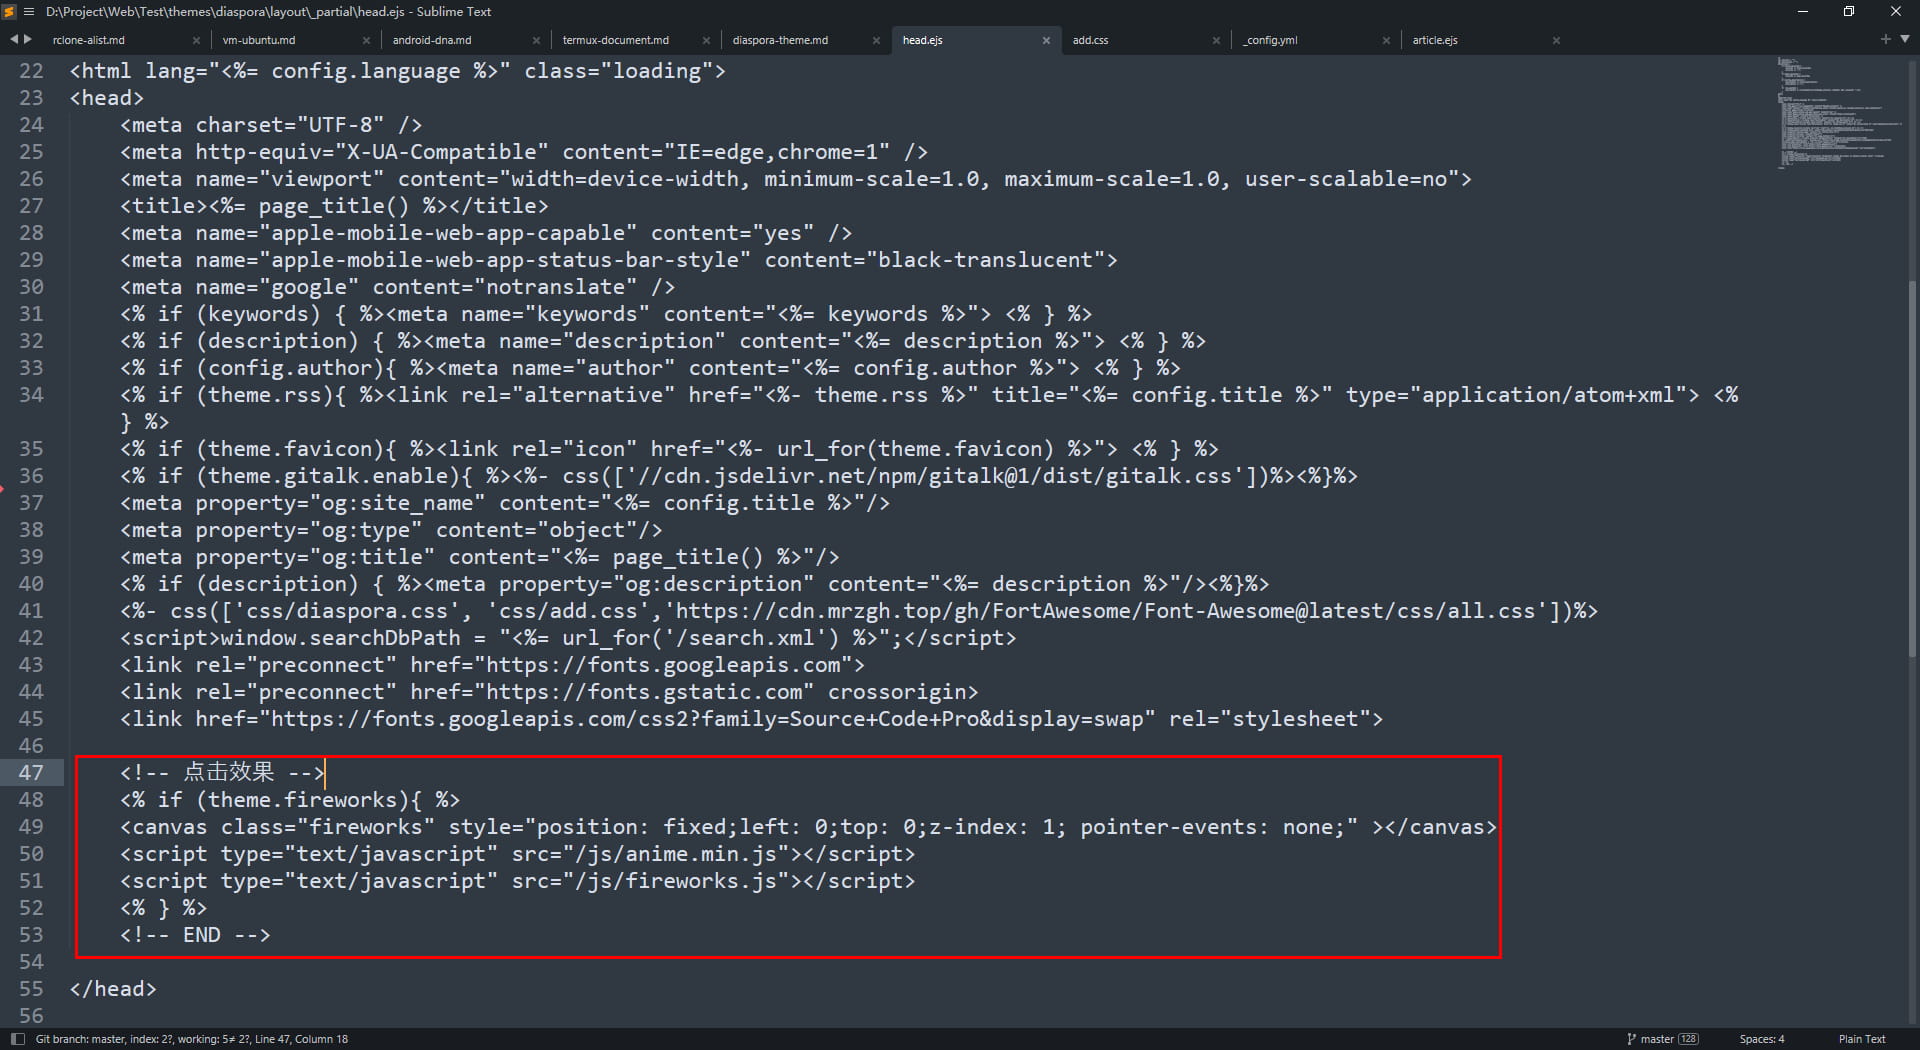
Themeroot/source/js/ 目录下新建 anime.min.js 文件,写入下面命令1
2
3
4
5
6
7
8
9
10
11
12
13
14
15
16
17
18
19
20
21
22
23
24
25
26
27
28
29
30
31
32
33
/*
 2017 Julian Garnier
 Released under the MIT license
*/
var $jscomp={scope:{}};$jscomp.defineProperty="function"==typeof Object.defineProperties?Object.defineProperty:function(e,r,p){if(p.get||p.set)throw new TypeError("ES3 does not support getters and setters.");e!=Array.prototype&&e!=Object.prototype&&(e[r]=p.value)};$jscomp.getGlobal=function(e){return"undefined"!=typeof window&&window===e?e:"undefined"!=typeof global&&null!=global?global:e};$jscomp.global=$jscomp.getGlobal(this);$jscomp.SYMBOL_PREFIX="jscomp_symbol_";
$jscomp.initSymbol=function(){$jscomp.initSymbol=function(){};$jscomp.global.Symbol||($jscomp.global.Symbol=$jscomp.Symbol)};$jscomp.symbolCounter_=0;$jscomp.Symbol=function(e){return $jscomp.SYMBOL_PREFIX+(e||"")+$jscomp.symbolCounter_++};
$jscomp.initSymbolIterator=function(){$jscomp.initSymbol();var e=$jscomp.global.Symbol.iterator;e||(e=$jscomp.global.Symbol.iterator=$jscomp.global.Symbol("iterator"));"function"!=typeof Array.prototype[e]&&$jscomp.defineProperty(Array.prototype,e,{configurable:!0,writable:!0,value:function(){return $jscomp.arrayIterator(this)}});$jscomp.initSymbolIterator=function(){}};$jscomp.arrayIterator=function(e){var r=0;return $jscomp.iteratorPrototype(function(){return r<e.length?{done:!1,value:e[r++]}:{done:!0}})};
$jscomp.iteratorPrototype=function(e){$jscomp.initSymbolIterator();e={next:e};e[$jscomp.global.Symbol.iterator]=function(){return this};return e};$jscomp.array=$jscomp.array||{};$jscomp.iteratorFromArray=function(e,r){$jscomp.initSymbolIterator();e instanceof String&&(e+="");var p=0,m={next:function(){if(p<e.length){var u=p++;return{value:r(u,e[u]),done:!1}}m.next=function(){return{done:!0,value:void 0}};return m.next()}};m[Symbol.iterator]=function(){return m};return m};
$jscomp.polyfill=function(e,r,p,m){if(r){p=$jscomp.global;e=e.split(".");for(m=0;m<e.length-1;m++){var u=e[m];u in p||(p[u]={});p=p[u]}e=e[e.length-1];m=p[e];r=r(m);r!=m&&null!=r&&$jscomp.defineProperty(p,e,{configurable:!0,writable:!0,value:r})}};$jscomp.polyfill("Array.prototype.keys",function(e){return e?e:function(){return $jscomp.iteratorFromArray(this,function(e){return e})}},"es6-impl","es3");var $jscomp$this=this;
(function(e,r){"function"===typeof define&&define.amd?define([],r):"object"===typeof module&&module.exports?module.exports=r():e.anime=r()})(this,function(){function e(a){if(!h.col(a))try{return document.querySelectorAll(a)}catch(c){}}function r(a,c){for(var d=a.length,b=2<=arguments.length?arguments[1]:void 0,f=[],n=0;n<d;n++)if(n in a){var k=a[n];c.call(b,k,n,a)&&f.push(k)}return f}function p(a){return a.reduce(function(a,d){return a.concat(h.arr(d)?p(d):d)},[])}function m(a){if(h.arr(a))return a;
h.str(a)&&(a=e(a)||a);return a instanceof NodeList||a instanceof HTMLCollection?[].slice.call(a):[a]}function u(a,c){return a.some(function(a){return a===c})}function C(a){var c={},d;for(d in a)c[d]=a[d];return c}function D(a,c){var d=C(a),b;for(b in a)d[b]=c.hasOwnProperty(b)?c[b]:a[b];return d}function z(a,c){var d=C(a),b;for(b in c)d[b]=h.und(a[b])?c[b]:a[b];return d}function T(a){a=a.replace(/^#?([a-f\d])([a-f\d])([a-f\d])$/i,function(a,c,d,k){return c+c+d+d+k+k});var c=/^#?([a-f\d]{2})([a-f\d]{2})([a-f\d]{2})$/i.exec(a);
a=parseInt(c[1],16);var d=parseInt(c[2],16),c=parseInt(c[3],16);return"rgba("+a+","+d+","+c+",1)"}function U(a){function c(a,c,b){0>b&&(b+=1);1<b&&--b;return b<1/6?a+6*(c-a)*b:.5>b?c:b<2/3?a+(c-a)*(2/3-b)*6:a}var d=/hsl\((\d+),\s*([\d.]+)%,\s*([\d.]+)%\)/g.exec(a)||/hsla\((\d+),\s*([\d.]+)%,\s*([\d.]+)%,\s*([\d.]+)\)/g.exec(a);a=parseInt(d[1])/360;var b=parseInt(d[2])/100,f=parseInt(d[3])/100,d=d[4]||1;if(0==b)f=b=a=f;else{var n=.5>f?f*(1+b):f+b-f*b,k=2*f-n,f=c(k,n,a+1/3),b=c(k,n,a);a=c(k,n,a-1/3)}return"rgba("+
255*f+","+255*b+","+255*a+","+d+")"}function y(a){if(a=/([\+\-]?[0-9#\.]+)(%|px|pt|em|rem|in|cm|mm|ex|ch|pc|vw|vh|vmin|vmax|deg|rad|turn)?$/.exec(a))return a[2]}function V(a){if(-1<a.indexOf("translate")||"perspective"===a)return"px";if(-1<a.indexOf("rotate")||-1<a.indexOf("skew"))return"deg"}function I(a,c){return h.fnc(a)?a(c.target,c.id,c.total):a}function E(a,c){if(c in a.style)return getComputedStyle(a).getPropertyValue(c.replace(/([a-z])([A-Z])/g,"$1-$2").toLowerCase())||"0"}function J(a,c){if(h.dom(a)&&
u(W,c))return"transform";if(h.dom(a)&&(a.getAttribute(c)||h.svg(a)&&a[c]))return"attribute";if(h.dom(a)&&"transform"!==c&&E(a,c))return"css";if(null!=a[c])return"object"}function X(a,c){var d=V(c),d=-1<c.indexOf("scale")?1:0+d;a=a.style.transform;if(!a)return d;for(var b=[],f=[],n=[],k=/(\w+)\((.+?)\)/g;b=k.exec(a);)f.push(b[1]),n.push(b[2]);a=r(n,function(a,b){return f[b]===c});return a.length?a[0]:d}function K(a,c){switch(J(a,c)){case "transform":return X(a,c);case "css":return E(a,c);case "attribute":return a.getAttribute(c)}return a[c]||
0}function L(a,c){var d=/^(\*=|\+=|-=)/.exec(a);if(!d)return a;var b=y(a)||0;c=parseFloat(c);a=parseFloat(a.replace(d[0],""));switch(d[0][0]){case "+":return c+a+b;case "-":return c-a+b;case "*":return c*a+b}}function F(a,c){return Math.sqrt(Math.pow(c.x-a.x,2)+Math.pow(c.y-a.y,2))}function M(a){a=a.points;for(var c=0,d,b=0;b<a.numberOfItems;b++){var f=a.getItem(b);0<b&&(c+=F(d,f));d=f}return c}function N(a){if(a.getTotalLength)return a.getTotalLength();switch(a.tagName.toLowerCase()){case "circle":return 2*
Math.PI*a.getAttribute("r");case "rect":return 2*a.getAttribute("width")+2*a.getAttribute("height");case "line":return F({x:a.getAttribute("x1"),y:a.getAttribute("y1")},{x:a.getAttribute("x2"),y:a.getAttribute("y2")});case "polyline":return M(a);case "polygon":var c=a.points;return M(a)+F(c.getItem(c.numberOfItems-1),c.getItem(0))}}function Y(a,c){function d(b){b=void 0===b?0:b;return a.el.getPointAtLength(1<=c+b?c+b:0)}var b=d(),f=d(-1),n=d(1);switch(a.property){case "x":return b.x;case "y":return b.y;
case "angle":return 180*Math.atan2(n.y-f.y,n.x-f.x)/Math.PI}}function O(a,c){var d=/-?\d*\.?\d+/g,b;b=h.pth(a)?a.totalLength:a;if(h.col(b))if(h.rgb(b)){var f=/rgb\((\d+,\s*[\d]+,\s*[\d]+)\)/g.exec(b);b=f?"rgba("+f[1]+",1)":b}else b=h.hex(b)?T(b):h.hsl(b)?U(b):void 0;else f=(f=y(b))?b.substr(0,b.length-f.length):b,b=c&&!/\s/g.test(b)?f+c:f;b+="";return{original:b,numbers:b.match(d)?b.match(d).map(Number):[0],strings:h.str(a)||c?b.split(d):[]}}function P(a){a=a?p(h.arr(a)?a.map(m):m(a)):[];return r(a,
function(a,d,b){return b.indexOf(a)===d})}function Z(a){var c=P(a);return c.map(function(a,b){return{target:a,id:b,total:c.length}})}function aa(a,c){var d=C(c);if(h.arr(a)){var b=a.length;2!==b||h.obj(a[0])?h.fnc(c.duration)||(d.duration=c.duration/b):a={value:a}}return m(a).map(function(a,b){b=b?0:c.delay;a=h.obj(a)&&!h.pth(a)?a:{value:a};h.und(a.delay)&&(a.delay=b);return a}).map(function(a){return z(a,d)})}function ba(a,c){var d={},b;for(b in a){var f=I(a[b],c);h.arr(f)&&(f=f.map(function(a){return I(a,
c)}),1===f.length&&(f=f[0]));d[b]=f}d.duration=parseFloat(d.duration);d.delay=parseFloat(d.delay);return d}function ca(a){return h.arr(a)?A.apply(this,a):Q[a]}function da(a,c){var d;return a.tweens.map(function(b){b=ba(b,c);var f=b.value,e=K(c.target,a.name),k=d?d.to.original:e,k=h.arr(f)?f[0]:k,w=L(h.arr(f)?f[1]:f,k),e=y(w)||y(k)||y(e);b.from=O(k,e);b.to=O(w,e);b.start=d?d.end:a.offset;b.end=b.start+b.delay+b.duration;b.easing=ca(b.easing);b.elasticity=(1E3-Math.min(Math.max(b.elasticity,1),999))/
1E3;b.isPath=h.pth(f);b.isColor=h.col(b.from.original);b.isColor&&(b.round=1);return d=b})}function ea(a,c){return r(p(a.map(function(a){return c.map(function(b){var c=J(a.target,b.name);if(c){var d=da(b,a);b={type:c,property:b.name,animatable:a,tweens:d,duration:d[d.length-1].end,delay:d[0].delay}}else b=void 0;return b})})),function(a){return!h.und(a)})}function R(a,c,d,b){var f="delay"===a;return c.length?(f?Math.min:Math.max).apply(Math,c.map(function(b){return b[a]})):f?b.delay:d.offset+b.delay+
b.duration}function fa(a){var c=D(ga,a),d=D(S,a),b=Z(a.targets),f=[],e=z(c,d),k;for(k in a)e.hasOwnProperty(k)||"targets"===k||f.push({name:k,offset:e.offset,tweens:aa(a[k],d)});a=ea(b,f);return z(c,{children:[],animatables:b,animations:a,duration:R("duration",a,c,d),delay:R("delay",a,c,d)})}function q(a){function c(){return window.Promise&&new Promise(function(a){return p=a})}function d(a){return g.reversed?g.duration-a:a}function b(a){for(var b=0,c={},d=g.animations,f=d.length;b<f;){var e=d[b],
k=e.animatable,h=e.tweens,n=h.length-1,l=h[n];n&&(l=r(h,function(b){return a<b.end})[0]||l);for(var h=Math.min(Math.max(a-l.start-l.delay,0),l.duration)/l.duration,w=isNaN(h)?1:l.easing(h,l.elasticity),h=l.to.strings,p=l.round,n=[],m=void 0,m=l.to.numbers.length,t=0;t<m;t++){var x=void 0,x=l.to.numbers[t],q=l.from.numbers[t],x=l.isPath?Y(l.value,w*x):q+w*(x-q);p&&(l.isColor&&2<t||(x=Math.round(x*p)/p));n.push(x)}if(l=h.length)for(m=h[0],w=0;w<l;w++)p=h[w+1],t=n[w],isNaN(t)||(m=p?m+(t+p):m+(t+" "));
else m=n[0];ha[e.type](k.target,e.property,m,c,k.id);e.currentValue=m;b++}if(b=Object.keys(c).length)for(d=0;d<b;d++)H||(H=E(document.body,"transform")?"transform":"-webkit-transform"),g.animatables[d].target.style[H]=c[d].join(" ");g.currentTime=a;g.progress=a/g.duration*100}function f(a){if(g[a])g[a](g)}function e(){g.remaining&&!0!==g.remaining&&g.remaining--}function k(a){var k=g.duration,n=g.offset,w=n+g.delay,r=g.currentTime,x=g.reversed,q=d(a);if(g.children.length){var u=g.children,v=u.length;
if(q>=g.currentTime)for(var G=0;G<v;G++)u[G].seek(q);else for(;v--;)u[v].seek(q)}if(q>=w||!k)g.began||(g.began=!0,f("begin")),f("run");if(q>n&&q<k)b(q);else if(q<=n&&0!==r&&(b(0),x&&e()),q>=k&&r!==k||!k)b(k),x||e();f("update");a>=k&&(g.remaining?(t=h,"alternate"===g.direction&&(g.reversed=!g.reversed)):(g.pause(),g.completed||(g.completed=!0,f("complete"),"Promise"in window&&(p(),m=c()))),l=0)}a=void 0===a?{}:a;var h,t,l=0,p=null,m=c(),g=fa(a);g.reset=function(){var a=g.direction,c=g.loop;g.currentTime=
0;g.progress=0;g.paused=!0;g.began=!1;g.completed=!1;g.reversed="reverse"===a;g.remaining="alternate"===a&&1===c?2:c;b(0);for(a=g.children.length;a--;)g.children[a].reset()};g.tick=function(a){h=a;t||(t=h);k((l+h-t)*q.speed)};g.seek=function(a){k(d(a))};g.pause=function(){var a=v.indexOf(g);-1<a&&v.splice(a,1);g.paused=!0};g.play=function(){g.paused&&(g.paused=!1,t=0,l=d(g.currentTime),v.push(g),B||ia())};g.reverse=function(){g.reversed=!g.reversed;t=0;l=d(g.currentTime)};g.restart=function(){g.pause();
g.reset();g.play()};g.finished=m;g.reset();g.autoplay&&g.play();return g}var ga={update:void 0,begin:void 0,run:void 0,complete:void 0,loop:1,direction:"normal",autoplay:!0,offset:0},S={duration:1E3,delay:0,easing:"easeOutElastic",elasticity:500,round:0},W="translateX translateY translateZ rotate rotateX rotateY rotateZ scale scaleX scaleY scaleZ skewX skewY perspective".split(" "),H,h={arr:function(a){return Array.isArray(a)},obj:function(a){return-1<Object.prototype.toString.call(a).indexOf("Object")},
pth:function(a){return h.obj(a)&&a.hasOwnProperty("totalLength")},svg:function(a){return a instanceof SVGElement},dom:function(a){return a.nodeType||h.svg(a)},str:function(a){return"string"===typeof a},fnc:function(a){return"function"===typeof a},und:function(a){return"undefined"===typeof a},hex:function(a){return/(^#[0-9A-F]{6}$)|(^#[0-9A-F]{3}$)/i.test(a)},rgb:function(a){return/^rgb/.test(a)},hsl:function(a){return/^hsl/.test(a)},col:function(a){return h.hex(a)||h.rgb(a)||h.hsl(a)}},A=function(){function a(a,
d,b){return(((1-3*b+3*d)*a+(3*b-6*d))*a+3*d)*a}return function(c,d,b,f){if(0<=c&&1>=c&&0<=b&&1>=b){var e=new Float32Array(11);if(c!==d||b!==f)for(var k=0;11>k;++k)e[k]=a(.1*k,c,b);return function(k){if(c===d&&b===f)return k;if(0===k)return 0;if(1===k)return 1;for(var h=0,l=1;10!==l&&e[l]<=k;++l)h+=.1;--l;var l=h+(k-e[l])/(e[l+1]-e[l])*.1,n=3*(1-3*b+3*c)*l*l+2*(3*b-6*c)*l+3*c;if(.001<=n){for(h=0;4>h;++h){n=3*(1-3*b+3*c)*l*l+2*(3*b-6*c)*l+3*c;if(0===n)break;var m=a(l,c,b)-k,l=l-m/n}k=l}else if(0===
n)k=l;else{var l=h,h=h+.1,g=0;do m=l+(h-l)/2,n=a(m,c,b)-k,0<n?h=m:l=m;while(1e-7<Math.abs(n)&&10>++g);k=m}return a(k,d,f)}}}}(),Q=function(){function a(a,b){return 0===a||1===a?a:-Math.pow(2,10*(a-1))*Math.sin(2*(a-1-b/(2*Math.PI)*Math.asin(1))*Math.PI/b)}var c="Quad Cubic Quart Quint Sine Expo Circ Back Elastic".split(" "),d={In:[[.55,.085,.68,.53],[.55,.055,.675,.19],[.895,.03,.685,.22],[.755,.05,.855,.06],[.47,0,.745,.715],[.95,.05,.795,.035],[.6,.04,.98,.335],[.6,-.28,.735,.045],a],Out:[[.25,
.46,.45,.94],[.215,.61,.355,1],[.165,.84,.44,1],[.23,1,.32,1],[.39,.575,.565,1],[.19,1,.22,1],[.075,.82,.165,1],[.175,.885,.32,1.275],function(b,c){return 1-a(1-b,c)}],InOut:[[.455,.03,.515,.955],[.645,.045,.355,1],[.77,0,.175,1],[.86,0,.07,1],[.445,.05,.55,.95],[1,0,0,1],[.785,.135,.15,.86],[.68,-.55,.265,1.55],function(b,c){return.5>b?a(2*b,c)/2:1-a(-2*b+2,c)/2}]},b={linear:A(.25,.25,.75,.75)},f={},e;for(e in d)f.type=e,d[f.type].forEach(function(a){return function(d,f){b["ease"+a.type+c[f]]=h.fnc(d)?
d:A.apply($jscomp$this,d)}}(f)),f={type:f.type};return b}(),ha={css:function(a,c,d){return a.style[c]=d},attribute:function(a,c,d){return a.setAttribute(c,d)},object:function(a,c,d){return a[c]=d},transform:function(a,c,d,b,f){b[f]||(b[f]=[]);b[f].push(c+"("+d+")")}},v=[],B=0,ia=function(){function a(){B=requestAnimationFrame(c)}function c(c){var b=v.length;if(b){for(var d=0;d<b;)v[d]&&v[d].tick(c),d++;a()}else cancelAnimationFrame(B),B=0}return a}();q.version="2.2.0";q.speed=1;q.running=v;q.remove=
function(a){a=P(a);for(var c=v.length;c--;)for(var d=v[c],b=d.animations,f=b.length;f--;)u(a,b[f].animatable.target)&&(b.splice(f,1),b.length||d.pause())};q.getValue=K;q.path=function(a,c){var d=h.str(a)?e(a)[0]:a,b=c||100;return function(a){return{el:d,property:a,totalLength:N(d)*(b/100)}}};q.setDashoffset=function(a){var c=N(a);a.setAttribute("stroke-dasharray",c);return c};q.bezier=A;q.easings=Q;q.timeline=function(a){var c=q(a);c.pause();c.duration=0;c.add=function(d){c.children.forEach(function(a){a.began=
!0;a.completed=!0});m(d).forEach(function(b){var d=z(b,D(S,a||{}));d.targets=d.targets||a.targets;b=c.duration;var e=d.offset;d.autoplay=!1;d.direction=c.direction;d.offset=h.und(e)?b:L(e,b);c.began=!0;c.completed=!0;c.seek(d.offset);d=q(d);d.began=!0;d.completed=!0;d.duration>b&&(c.duration=d.duration);c.children.push(d)});c.seek(0);c.reset();c.autoplay&&c.restart();return c};return c};q.random=function(a,c){return Math.floor(Math.random()*(c-a+1))+a};return q});Themeroot/source/js/ 目录下新建 fireworks.js 文件,写入下面命令1
"use strict";function updateCoords(e){pointerX=(e.clientX||e.touches[0].clientX)-canvasEl.getBoundingClientRect().left,pointerY=e.clientY||e.touches[0].clientY-canvasEl.getBoundingClientRect().top}function setParticuleDirection(e){var t=anime.random(0,360)*Math.PI/180,a=anime.random(50,180),n=[-1,1][anime.random(0,1)]*a;return{x:e.x+n*Math.cos(t),y:e.y+n*Math.sin(t)}}function createParticule(e,t){var a={};return a.x=e,a.y=t,a.color=colors[anime.random(0,colors.length-1)],a.radius=anime.random(16,32),a.endPos=setParticuleDirection(a),a.draw=function(){ctx.beginPath(),ctx.arc(a.x,a.y,a.radius,0,2*Math.PI,!0),ctx.fillStyle=a.color,ctx.fill()},a}function createCircle(e,t){var a={};return a.x=e,a.y=t,a.color="#F00",a.radius=0.1,a.alpha=0.5,a.lineWidth=6,a.draw=function(){ctx.globalAlpha=a.alpha,ctx.beginPath(),ctx.arc(a.x,a.y,a.radius,0,2*Math.PI,!0),ctx.lineWidth=a.lineWidth,ctx.strokeStyle=a.color,ctx.stroke(),ctx.globalAlpha=1},a}function renderParticule(e){for(var t=0;t<e.animatables.length;t++){e.animatables[t].target.draw()}}function animateParticules(e,t){for(var a=createCircle(e,t),n=[],i=0;i<numberOfParticules;i++){n.push(createParticule(e,t))}anime.timeline().add({targets:n,x:function(e){return e.endPos.x},y:function(e){return e.endPos.y},radius:0.1,duration:anime.random(1200,1800),easing:"easeOutExpo",update:renderParticule}).add({targets:a,radius:anime.random(80,160),lineWidth:0,alpha:{value:0,easing:"linear",duration:anime.random(600,800)},duration:anime.random(1200,1800),easing:"easeOutExpo",update:renderParticule,offset:0})}function debounce(e,t){var a;return function(){var n=this,i=arguments;clearTimeout(a),a=setTimeout(function(){e.apply(n,i)},t)}}var canvasEl=document.querySelector(".fireworks");if(canvasEl){var ctx=canvasEl.getContext("2d"),numberOfParticules=30,pointerX=0,pointerY=0,tap="mousedown",colors=["#FF1461","#18FF92","#5A87FF","#FBF38C"],setCanvasSize=debounce(function(){canvasEl.width=2*window.innerWidth,canvasEl.height=2*window.innerHeight,canvasEl.style.width=window.innerWidth+"px",canvasEl.style.height=window.innerHeight+"px",canvasEl.getContext("2d").scale(2,2)},500),render=anime({duration:1/0,update:function(){ctx.clearRect(0,0,canvasEl.width,canvasEl.height)}});document.addEventListener(tap,function(e){"sidebar"!==e.target.id&&"toggle-sidebar"!==e.target.id&&"A"!==e.target.nodeName&&"IMG"!==e.target.nodeName&&(render.play(),updateCoords(e),animateParticules(pointerX,pointerY))},!1),setCanvasSize(),window.addEventListener("resize",setCanvasSize,!1)}"use strict";function updateCoords(e){pointerX=(e.clientX||e.touches[0].clientX)-canvasEl.getBoundingClientRect().left,pointerY=e.clientY||e.touches[0].clientY-canvasEl.getBoundingClientRect().top}function setParticuleDirection(e){var t=anime.random(0,360)*Math.PI/180,a=anime.random(50,180),n=[-1,1][anime.random(0,1)]*a;return{x:e.x+n*Math.cos(t),y:e.y+n*Math.sin(t)}}function createParticule(e,t){var a={};return a.x=e,a.y=t,a.color=colors[anime.random(0,colors.length-1)],a.radius=anime.random(16,32),a.endPos=setParticuleDirection(a),a.draw=function(){ctx.beginPath(),ctx.arc(a.x,a.y,a.radius,0,2*Math.PI,!0),ctx.fillStyle=a.color,ctx.fill()},a}function createCircle(e,t){var a={};return a.x=e,a.y=t,a.color="#F00",a.radius=0.1,a.alpha=0.5,a.lineWidth=6,a.draw=function(){ctx.globalAlpha=a.alpha,ctx.beginPath(),ctx.arc(a.x,a.y,a.radius,0,2*Math.PI,!0),ctx.lineWidth=a.lineWidth,ctx.strokeStyle=a.color,ctx.stroke(),ctx.globalAlpha=1},a}function renderParticule(e){for(var t=0;t<e.animatables.length;t++){e.animatables[t].target.draw()}}function animateParticules(e,t){for(var a=createCircle(e,t),n=[],i=0;i<numberOfParticules;i++){n.push(createParticule(e,t))}anime.timeline().add({targets:n,x:function(e){return e.endPos.x},y:function(e){return e.endPos.y},radius:0.1,duration:anime.random(1200,1800),easing:"easeOutExpo",update:renderParticule}).add({targets:a,radius:anime.random(80,160),lineWidth:0,alpha:{value:0,easing:"linear",duration:anime.random(600,800)},duration:anime.random(1200,1800),easing:"easeOutExpo",update:renderParticule,offset:0})}function debounce(e,t){var a;return function(){var n=this,i=arguments;clearTimeout(a),a=setTimeout(function(){e.apply(n,i)},t)}}var canvasEl=document.querySelector(".fireworks");if(canvasEl){var ctx=canvasEl.getContext("2d"),numberOfParticules=30,pointerX=0,pointerY=0,tap="mousedown",colors=["#FF1461","#18FF92","#5A87FF","#FBF38C"],setCanvasSize=debounce(function(){canvasEl.width=2*window.innerWidth,canvasEl.height=2*window.innerHeight,canvasEl.style.width=window.innerWidth+"px",canvasEl.style.height=window.innerHeight+"px",canvasEl.getContext("2d").scale(2,2)},500),render=anime({duration:1/0,update:function(){ctx.clearRect(0,0,canvasEl.width,canvasEl.height)}});document.addEventListener(tap,function(e){"sidebar"!==e.target.id&&"toggle-sidebar"!==e.target.id&&"A"!==e.target.nodeName&&"IMG"!==e.target.nodeName&&(render.play(),updateCoords(e),animateParticules(pointerX,pointerY))},!1),setCanvasSize(),window.addEventListener("resize",setCanvasSize,!1)};Themeroot/_config.yml,在里面添加配置1
2
3
4
# 版权声明
copyright:
    enable: true
license: "CC BY"Themeroot/layout/_partial/post/ 目录下新建 copyright.ejs 文件,然后在里面添加配置信息1
2
3
4
5
6
7
8
9
10
11
12
13
14
15
16
17
18
19
20
21
22
23
<div class="statement">
  <div><span><%= __('copyright.author') %></span><%- config.author %></div>
  <div><span><%= __('copyright.title') %></span><%- page.title%></div>
  <div><span><%= __('copyright.link') %></span>
    <a href="<%- url_for(page.path) %>"><%- config.url %><%- url_for(page.path) %></a>
  </div>
  <div><span><%= __('copyright.license_title') %></span>本文采用
    <% if (theme.copyright.license.toUpperCase() === "CC BY"){ %>
    <a href="https://creativecommons.org/licenses/by/4.0/deed.zh">CC BY 4.0</a>
    <% } else if (theme.copyright.license.toUpperCase() === "CC BY-SA"){ %>
    <a href="https://creativecommons.org/licenses/by-sa/4.0/deed.zh">CC BY-SA 4.0</a>
    <% } else if (theme.copyright.license.toUpperCase() === "CC BY-NC"){ %>
    <a href="https://creativecommons.org/licenses/by-nc/4.0/deed.zh">CC BY-NC 4.0</a>
    <% } else if (theme.copyright.license.toUpperCase() === "CC BY-NC-SA"){ %>
    <a href="https://creativecommons.org/licenses/by-nc-sa/4.0/deed.zh">CC BY-NC-SA 4.0</a>
    <% } else if (theme.copyright.license.toUpperCase() === "CC BY-ND"){ %>
    <a href="https://creativecommons.org/licenses/by-nd/4.0/deed.zh">CC BY-ND 4.0</a>
    <% } else { %>
    <a href="https://creativecommons.org/licenses/by-nc-nd/4.0/deed.zh">CC BY-NC-ND 4.0</a>
    <% } %>
    进行声明
  </div>
</div>Themeroot/layout/_partial/post/article.ejs,在图中的位置添加代码1
2
3
4
5
 <!-- 版权声明 -->
<% if (theme.copyright.enable){ %>
    <%- partial("_partial/post/copyright") %>
<% } %>
<!-- END -->
Themeroot/source/css/add.css,在里面添加下列样式1
2
3
4
5
6
7
8
9
10
11
12
13
14
15
16
17
18
19
20
21
22
23
/*声明*/
.statement {
    width: 100%;
    border-radius: 12px;
    background-color: #f4f4f4;
    padding: 20px 0;
    margin-top: 35px;
}

.statement div {
    width: 90%;
    margin: 0 auto;
    padding: 2px 0;
}

.statement div a {
    color: #5A83DE;
}

.statement div span {
    font-weight: bold;
    margin-right: 5px;
}Themeroot/layout/_partial/post/article.ejs,在图中的位置添加代码1
2
3
<!-- 文章结束语 -->
<p class="end" >- END -</p>
<!-- END -->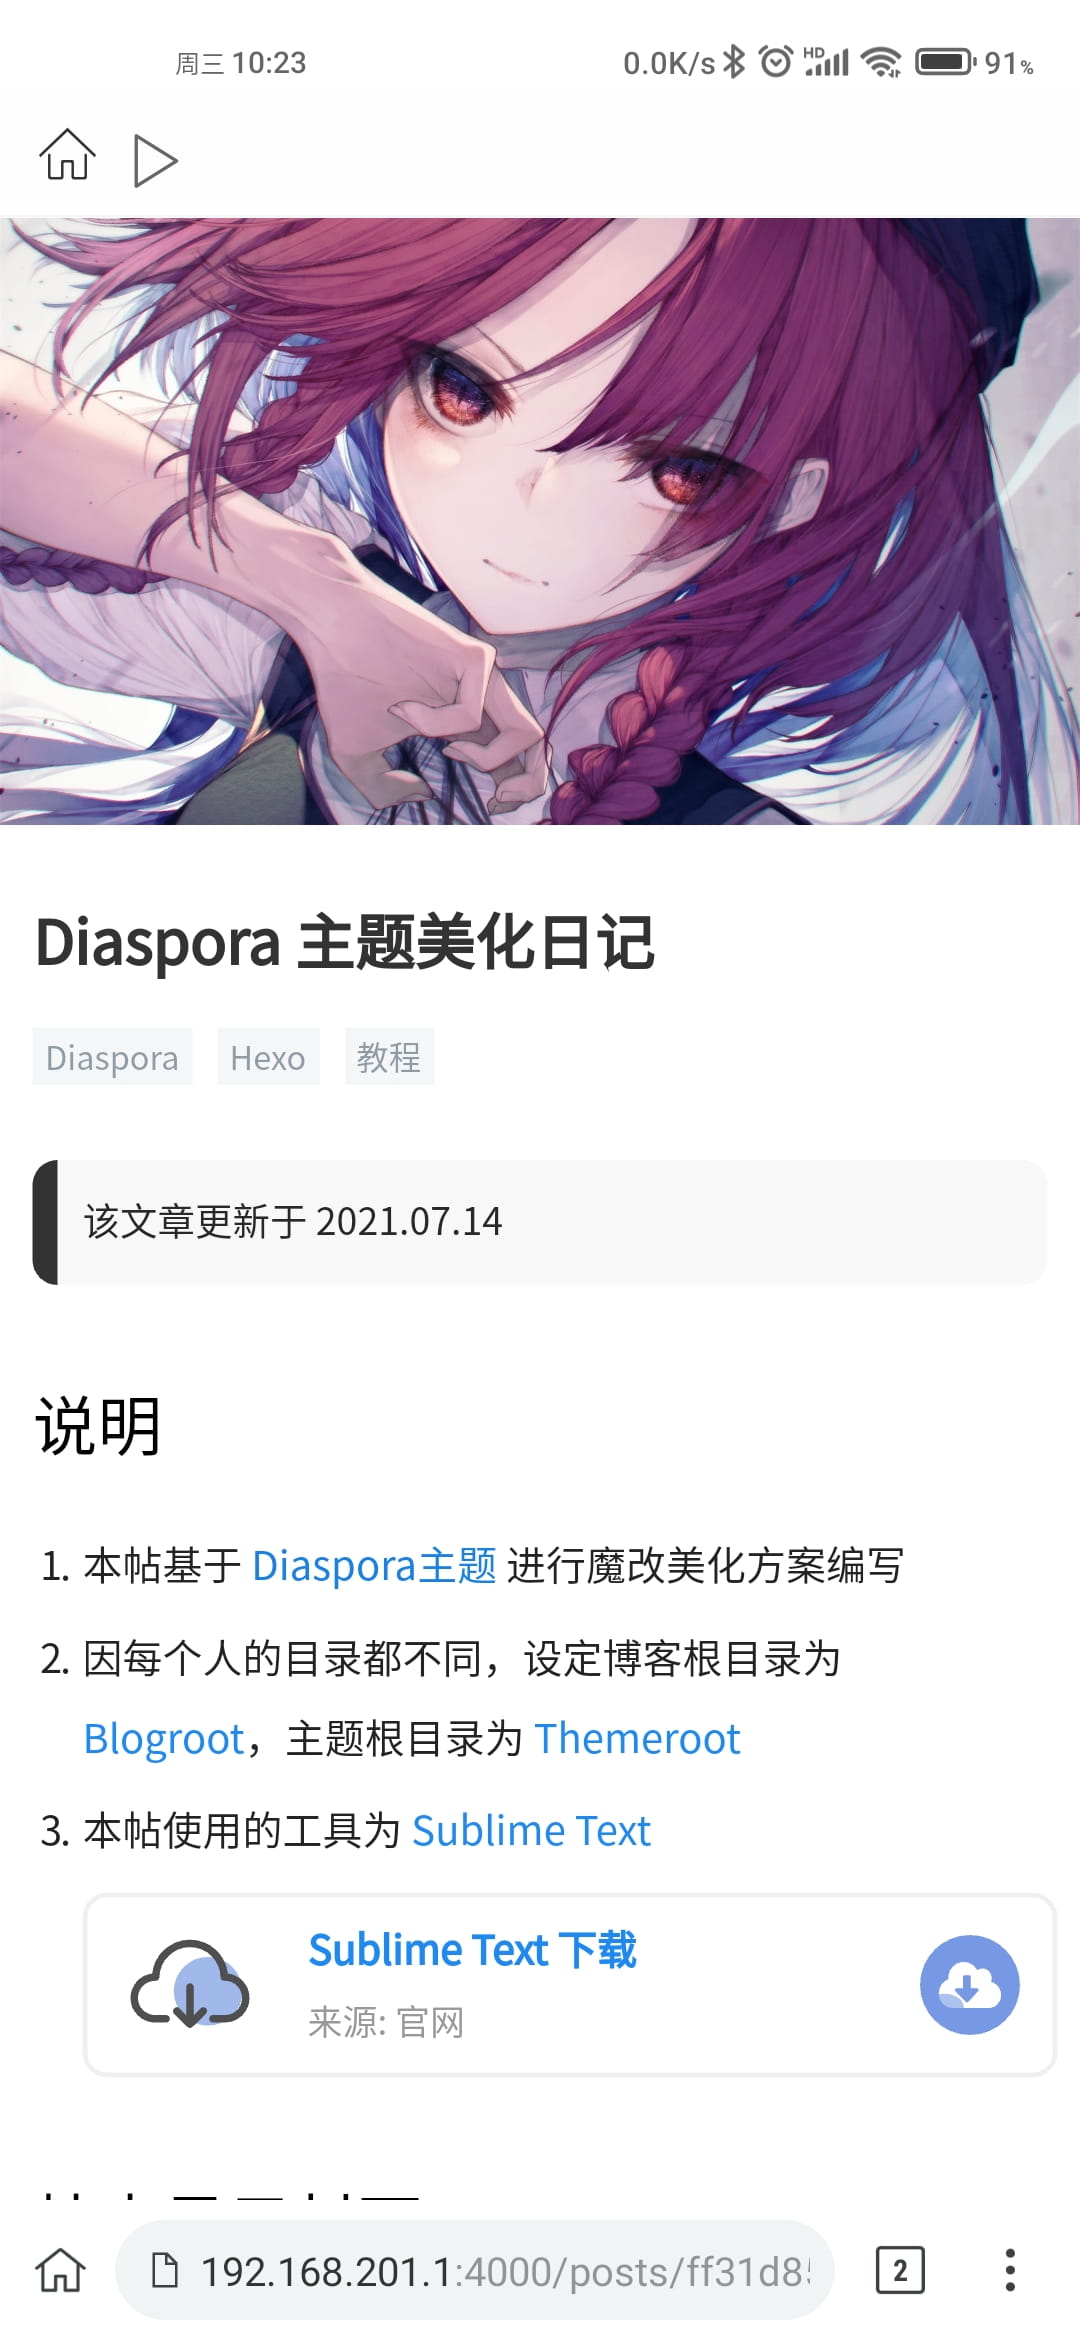
Themeroot/source/css/add.css,在里面添加下列样式1
2
3
4
5
6
7
8
/*结束*/
.end {
    width: 100%;
    margin: 50px 0 !important;
    text-align: center;
    color: #cccccc;
    font-weight: normal;
}Themeroot/layout/_partial/post/article.ejs,把图上的代码,修改成下列代码1
2
3
4
5
6
7
8
9
10
11
12
13
<!-- 悬浮 -->
<% if (theme.TOC == true){ %>
<div class="float">
    <!-- 目录 -->
    <div class="directory">
        <div class="directory_btn float_btn"></div>
        <div class="directory_list">
            <%- toc(page.content, {list_number: true}) %>
        </div>
    </div>
</div>
<%}%>
<!-- END -->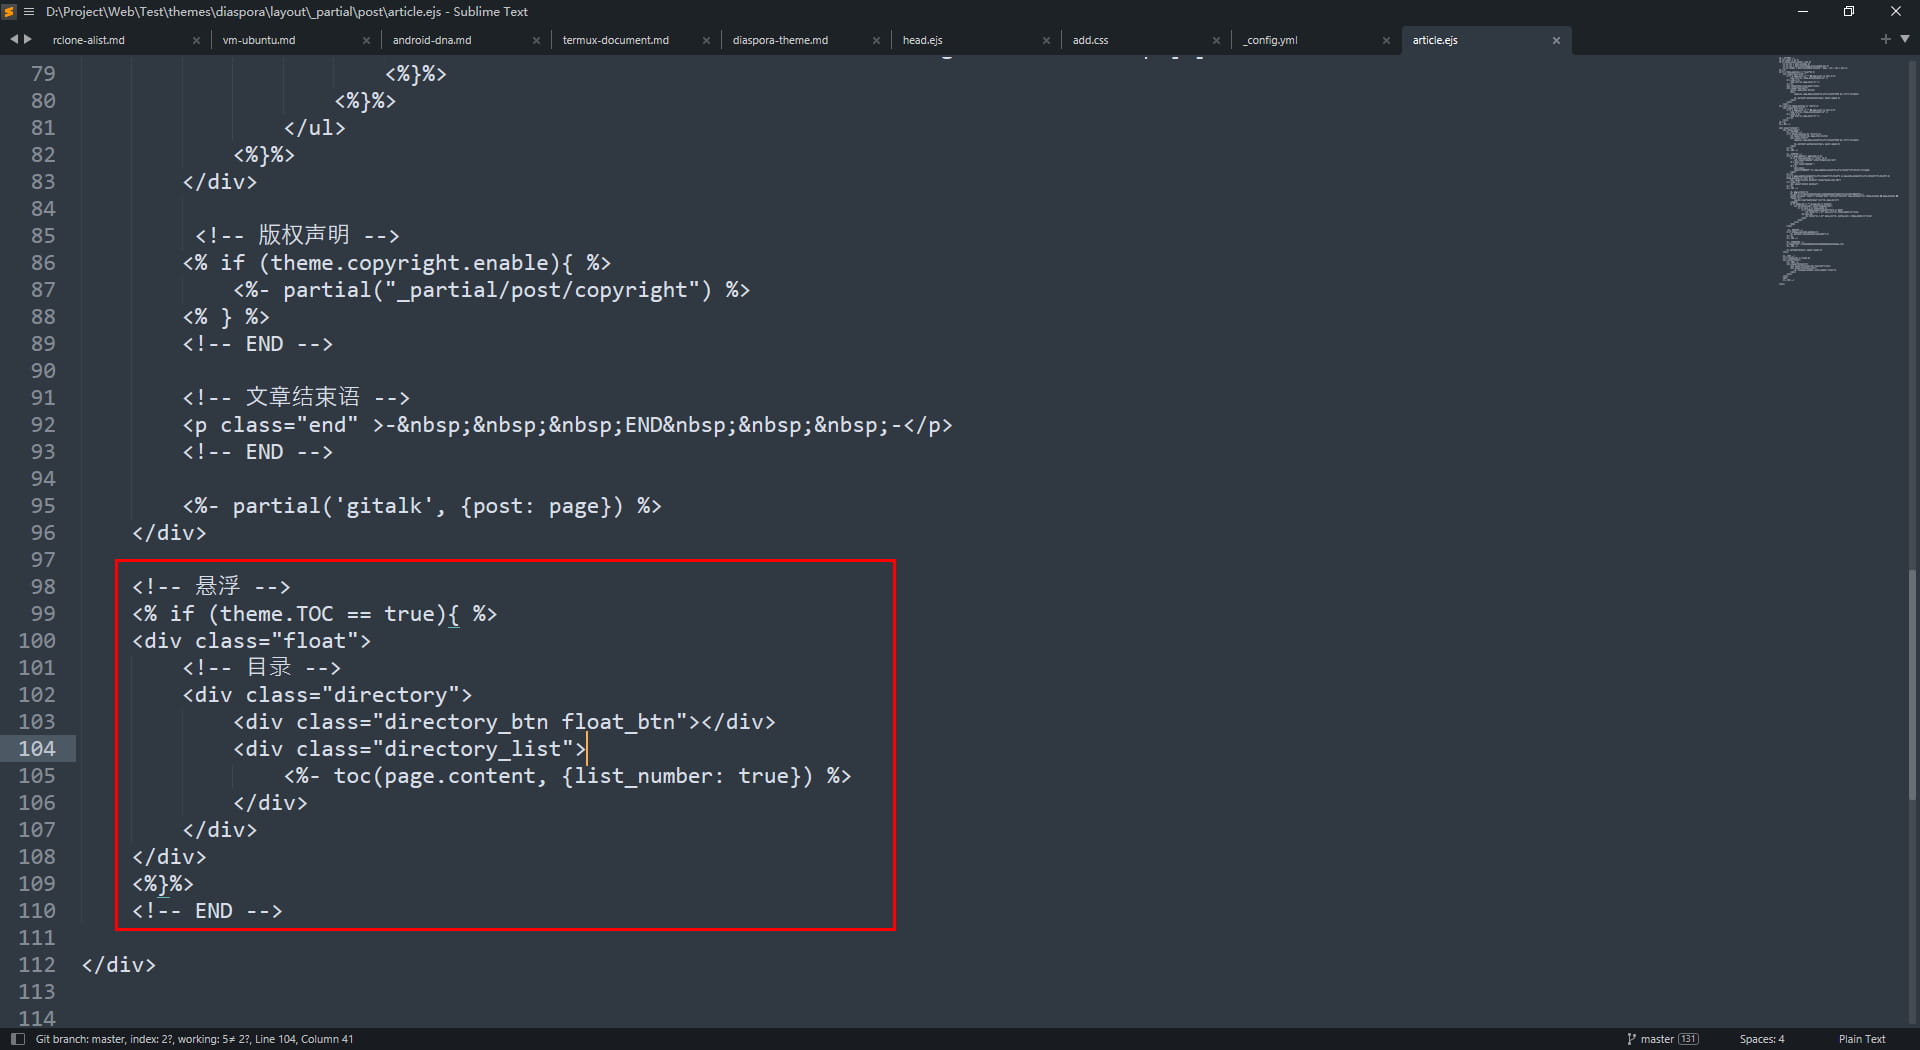
Themeroot/source/css/add.css,在里面添加下列样式1
2
3
4
5
6
7
8
9
10
11
12
13
14
15
16
17
18
19
20
21
22
23
24
25
26
27
28
29
30
31
32
33
34
35
36
37
38
39
40
41
42
43
44
45
46
47
48
49
50
51
52
53
54
55
56
57
58
59
60
61
62
63
64
65
66
67
68
69
70
71
72
73
74
75
76
/*悬浮*/
.float {
    width: auto !important;
    position: fixed;
    bottom: 50px;
    right: 30px;
    z-index: 99;
    padding: 0 !important;
    margin: 0 !important;
}

.float .directory {
    width: auto !important;
}

.float .float_btn {
    width: 50px;
    text-align: center;
    line-height: 50px;
    font-size: 22px;
    font-style: normal;
    background-color: #333333;
    border-radius: 50px;
    box-shadow: 0px 3px 10px rgba(0, 0, 0, 0.5);
    cursor: pointer;
}

.float .directory .directory_btn {
    font-family: "iconfont" !important;
}

.float .directory .directory_btn:before {
    content: "\e623";
    color: rgb(255, 255, 255) !important;
}

.float .directory .directory_list {
    width: auto;
    height: auto;
    max-width: 80%;
    max-height: 50%;
    overflow-y: scroll;
    background-color: #ffffff;
    position: fixed;
    right: 20px;
    bottom: 30px;
    display: none;
    box-shadow: 0px 5px 5px rgba(0, 0, 0, 0.3);
    border-radius: 10px;
    border-top: 5px solid #333333;
    z-index: 100;
    padding: 20px;
}

.float .directory:hover .directory_list {
    display: block;
}

/*目录*/
.article .toc {
    margin: 0 !important;
    padding: 0 !important;
    width: auto !important;
}

.directory_list li a {
    display: inline-block;
    color: #737373;
    text-decoration: none;
    transition: color, padding 0.2s ease-in-out;
}

.directory_list li a:hover {
    padding-left: 8px;
    border-left: 3px solid black;
}Blogroot 目录下,鼠标右键打开 git bash 命令窗口,输入以下命令,安装 hexo-shiki-plugin 插件1
npm install hexo-shiki-plugin --saveBlogroot/_config.yml,在里面修改配置1
2
3
4
5
6
7
8
9
10
11
12
13
14
15
16
17
18
shiki:
  theme: github-light # highlight-theme
  line_number: true # whether to show the line_number
  beautify: true # whether to add highlight tool true or false
  highlight_copy: true # copy button
  highlight_lang: true # show the code language
  highlight_height_limit: 360 # code-block max height,unit: px
  is_highlight_shrink: false # true: shrink the code blocks / false: expand the code blocks | none: expand code blocks and hide the button
  copy: # copy message
    success: '复制成功'
    error: '复制失败'
    no_support: '浏览器不支持'

syntax_highlighter:
highlight:
  enable: false
prismjs:
  enable: false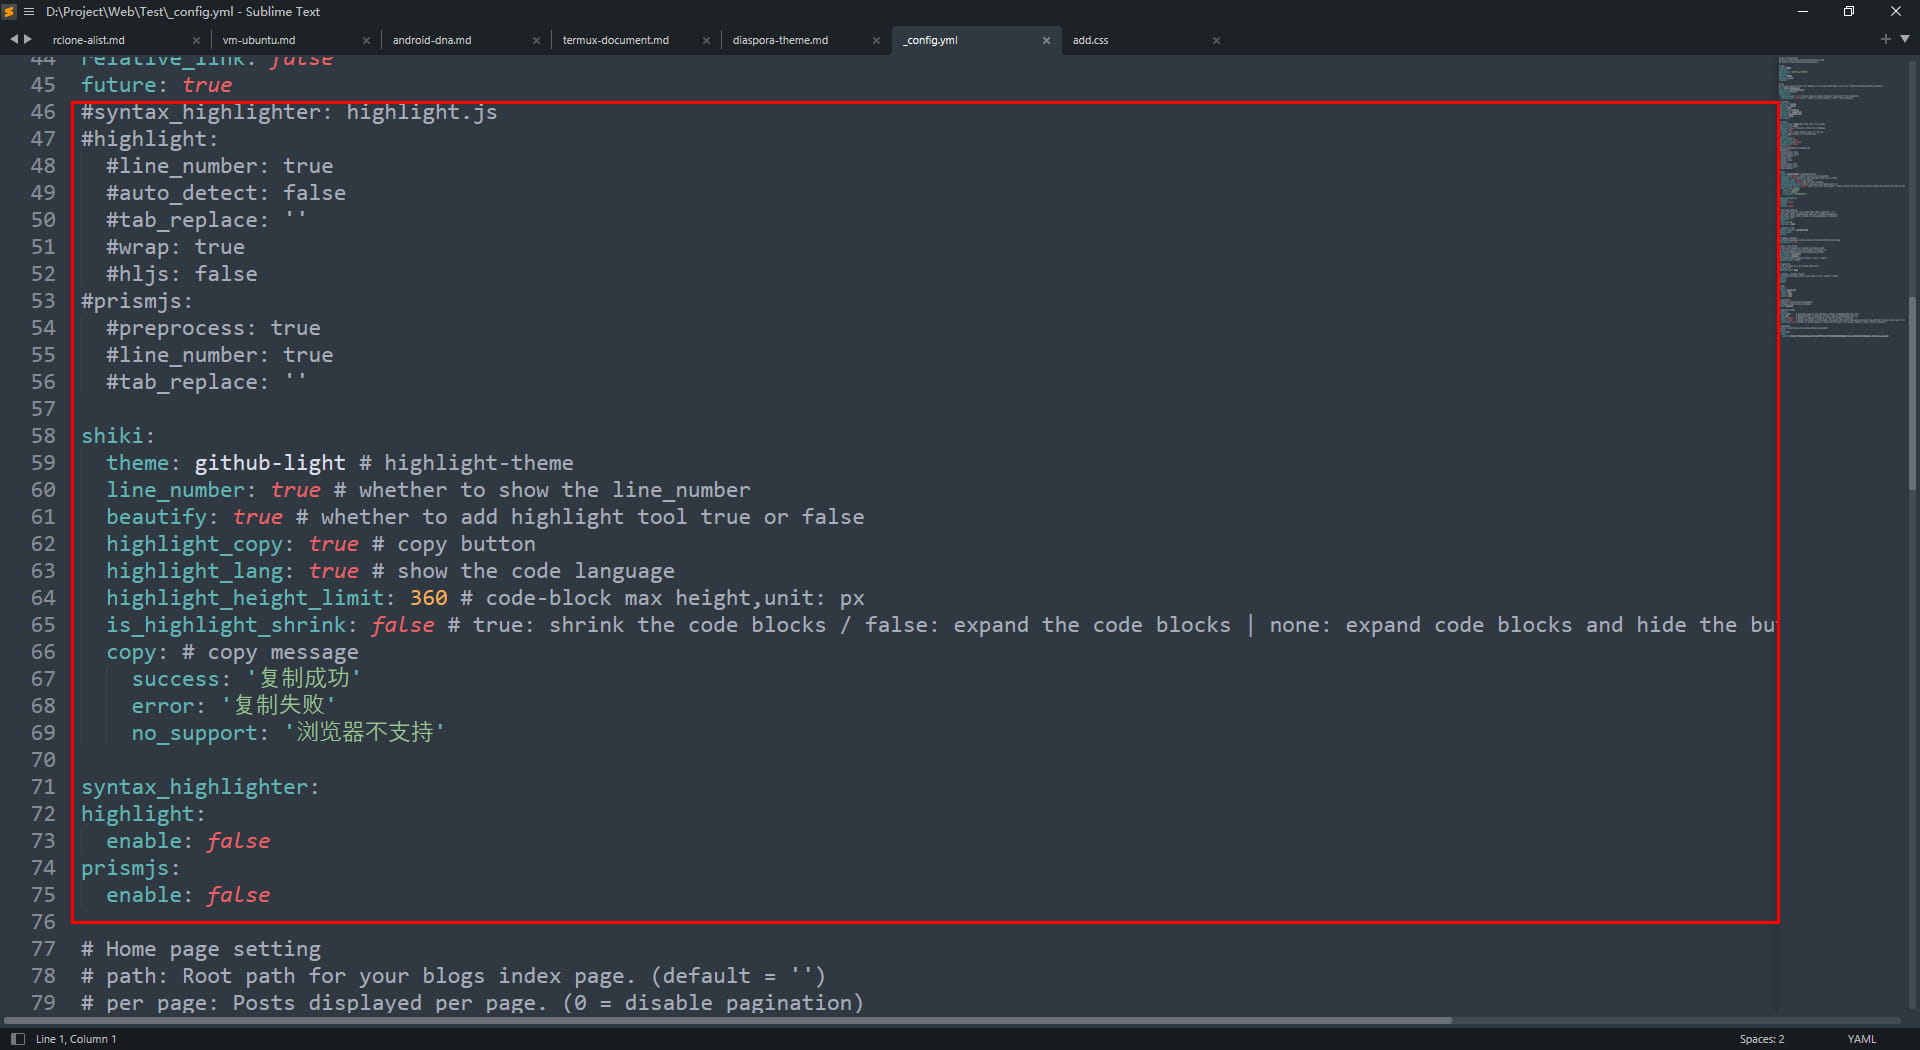
Themeroot/layout/_partial/head.ejs ,找到 <%- css(['css/diaspora.css', 'css/add.css'])%> ,修改为下面代码1
<%- css(['css/diaspora.css', 'css/add.css', 'https://cdn.mrzgh.top/gh/FortAwesome/Font-Awesome@latest/css/all.css'])%>Themeroot/source/css/add.css,在里面添加下列样式1
2
3
4
5
6
7
8
9
10
11
12
13
14
15
/*代码*/
:root {
  --hl-color: #e1e4e8;
  --hl-bg: #24292e;
  --hltools-bg: #1f2428;
  --hltools-color: #c5c5c5;
  --hlnumber-bg: #24292e;
  --hlnumber-color: #444d56;
  --hlscrollbar-bg: #32383e;
  --hlexpand-bg: linear-gradient(
    180deg,
    rgba(36, 41, 46, 0.6),
    rgba(36, 41, 46, 0.9)
  );
}- END -